Install Exegol
Installing Exegol starts with installing the entrypoint to the whole project: the Python wrapper. Once the wrapper is installed, everything else can be managed from it.
Hint
It is strongly advised to install Exegol on a Linux host, especially when planning on using Exegol for internal penetration tests. This is because Docker Desktop on Windows and macOS lacks a few features, mainly due to how these operating systems run Docker containers within an internal VM that doesn’t share the host’s network interfaces and USB accessories.
Once the wrapper is installed, the second step in setting up Exegol on a device is to install at least one Exegol image, either with exegol start (documentation
here), or with exegol install (documentation
here). Both actions will guide the user in installing an image if needed.
Requirements
The following elements are required before Exegol can be installed, whatever the host’s operating system is:
at least 100GB of free storage recommended (a minimum of 20GB could be enough, but only for the
lightimage).
Additional dependencies may be required depending on the host OS.
No additional dependencies for Linux environments.
Tip
From Linux systems, Docker can be installed quickly and easily with the following command-line:
curl -fsSL "https://get.docker.com/" -o get-docker.sh
sh get-docker.sh
Warning
By default, sudo will be required when running docker, hence needed as well for Exegol. For security reasons, it should stay that way, but it’s possible to change that. In order to run exegol from the user environment without sudo, the user must have the appropriate rights. You can use the following command to grant them to the current user:
# add the sudo group to the user
sudo usermod -aG docker $(id -u -n)

# "reload" the user groups with the newly added docker group
newgrp docker
For more information, official Docker documentation shows how to manage docker as a non root user.
Warning
Docker “Rootless mode” is not supported by Exegol as of yet. Please follow the install procedure mentionned above.
To support graphical applications (display sharing functionality, e.g. Bloodhound, Wireshark, Burp, etc.), additional dependencies and configuration are required:
Hint
The XQuartz requirement below is now optional if using the (beta) Graphical Remote Desktop feature instead of X11 sharing (join our Discord to know more about this beta feature).
XQuartz must be installed
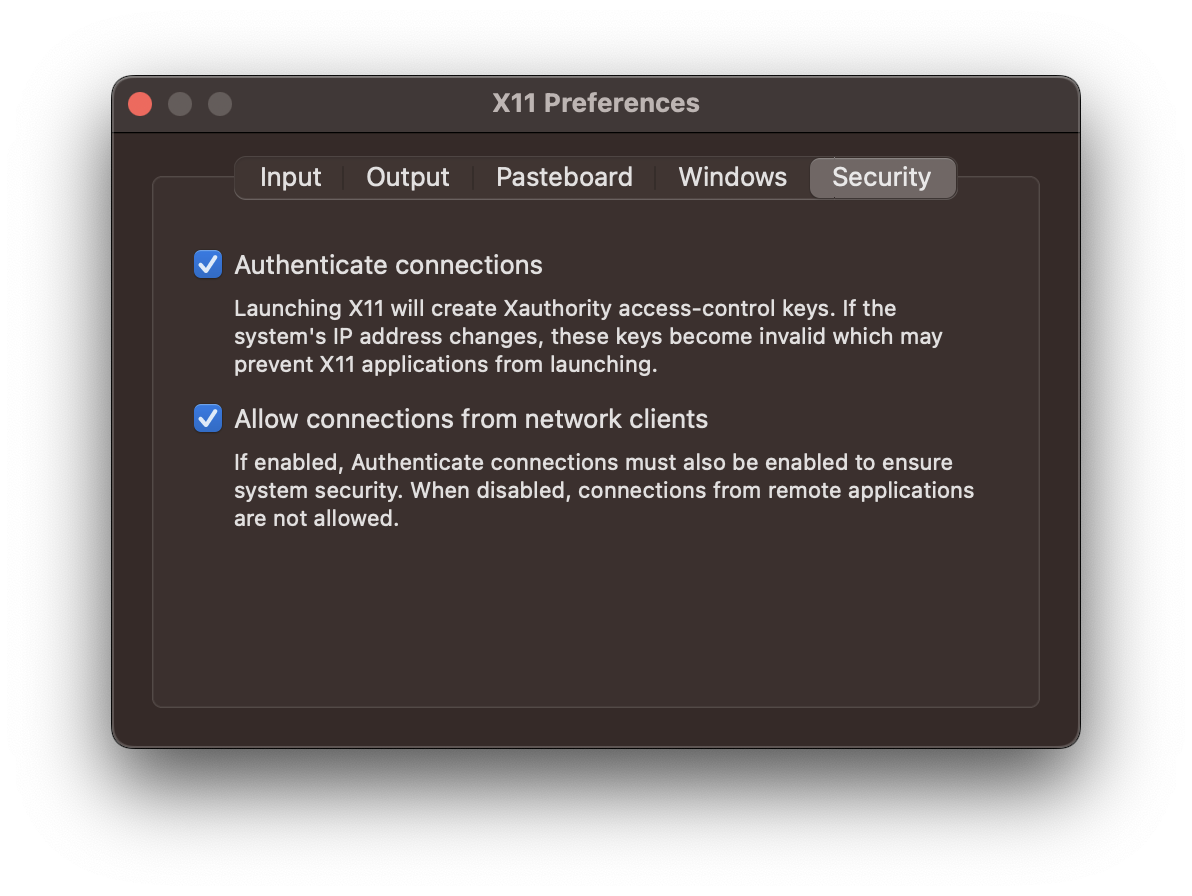
The XQuartz config
Allow connections from network clientsmust be set to trueDocker Desktop must be configured with default File Sharing (see screenshot below)
macOS XQuartz configuration requirement
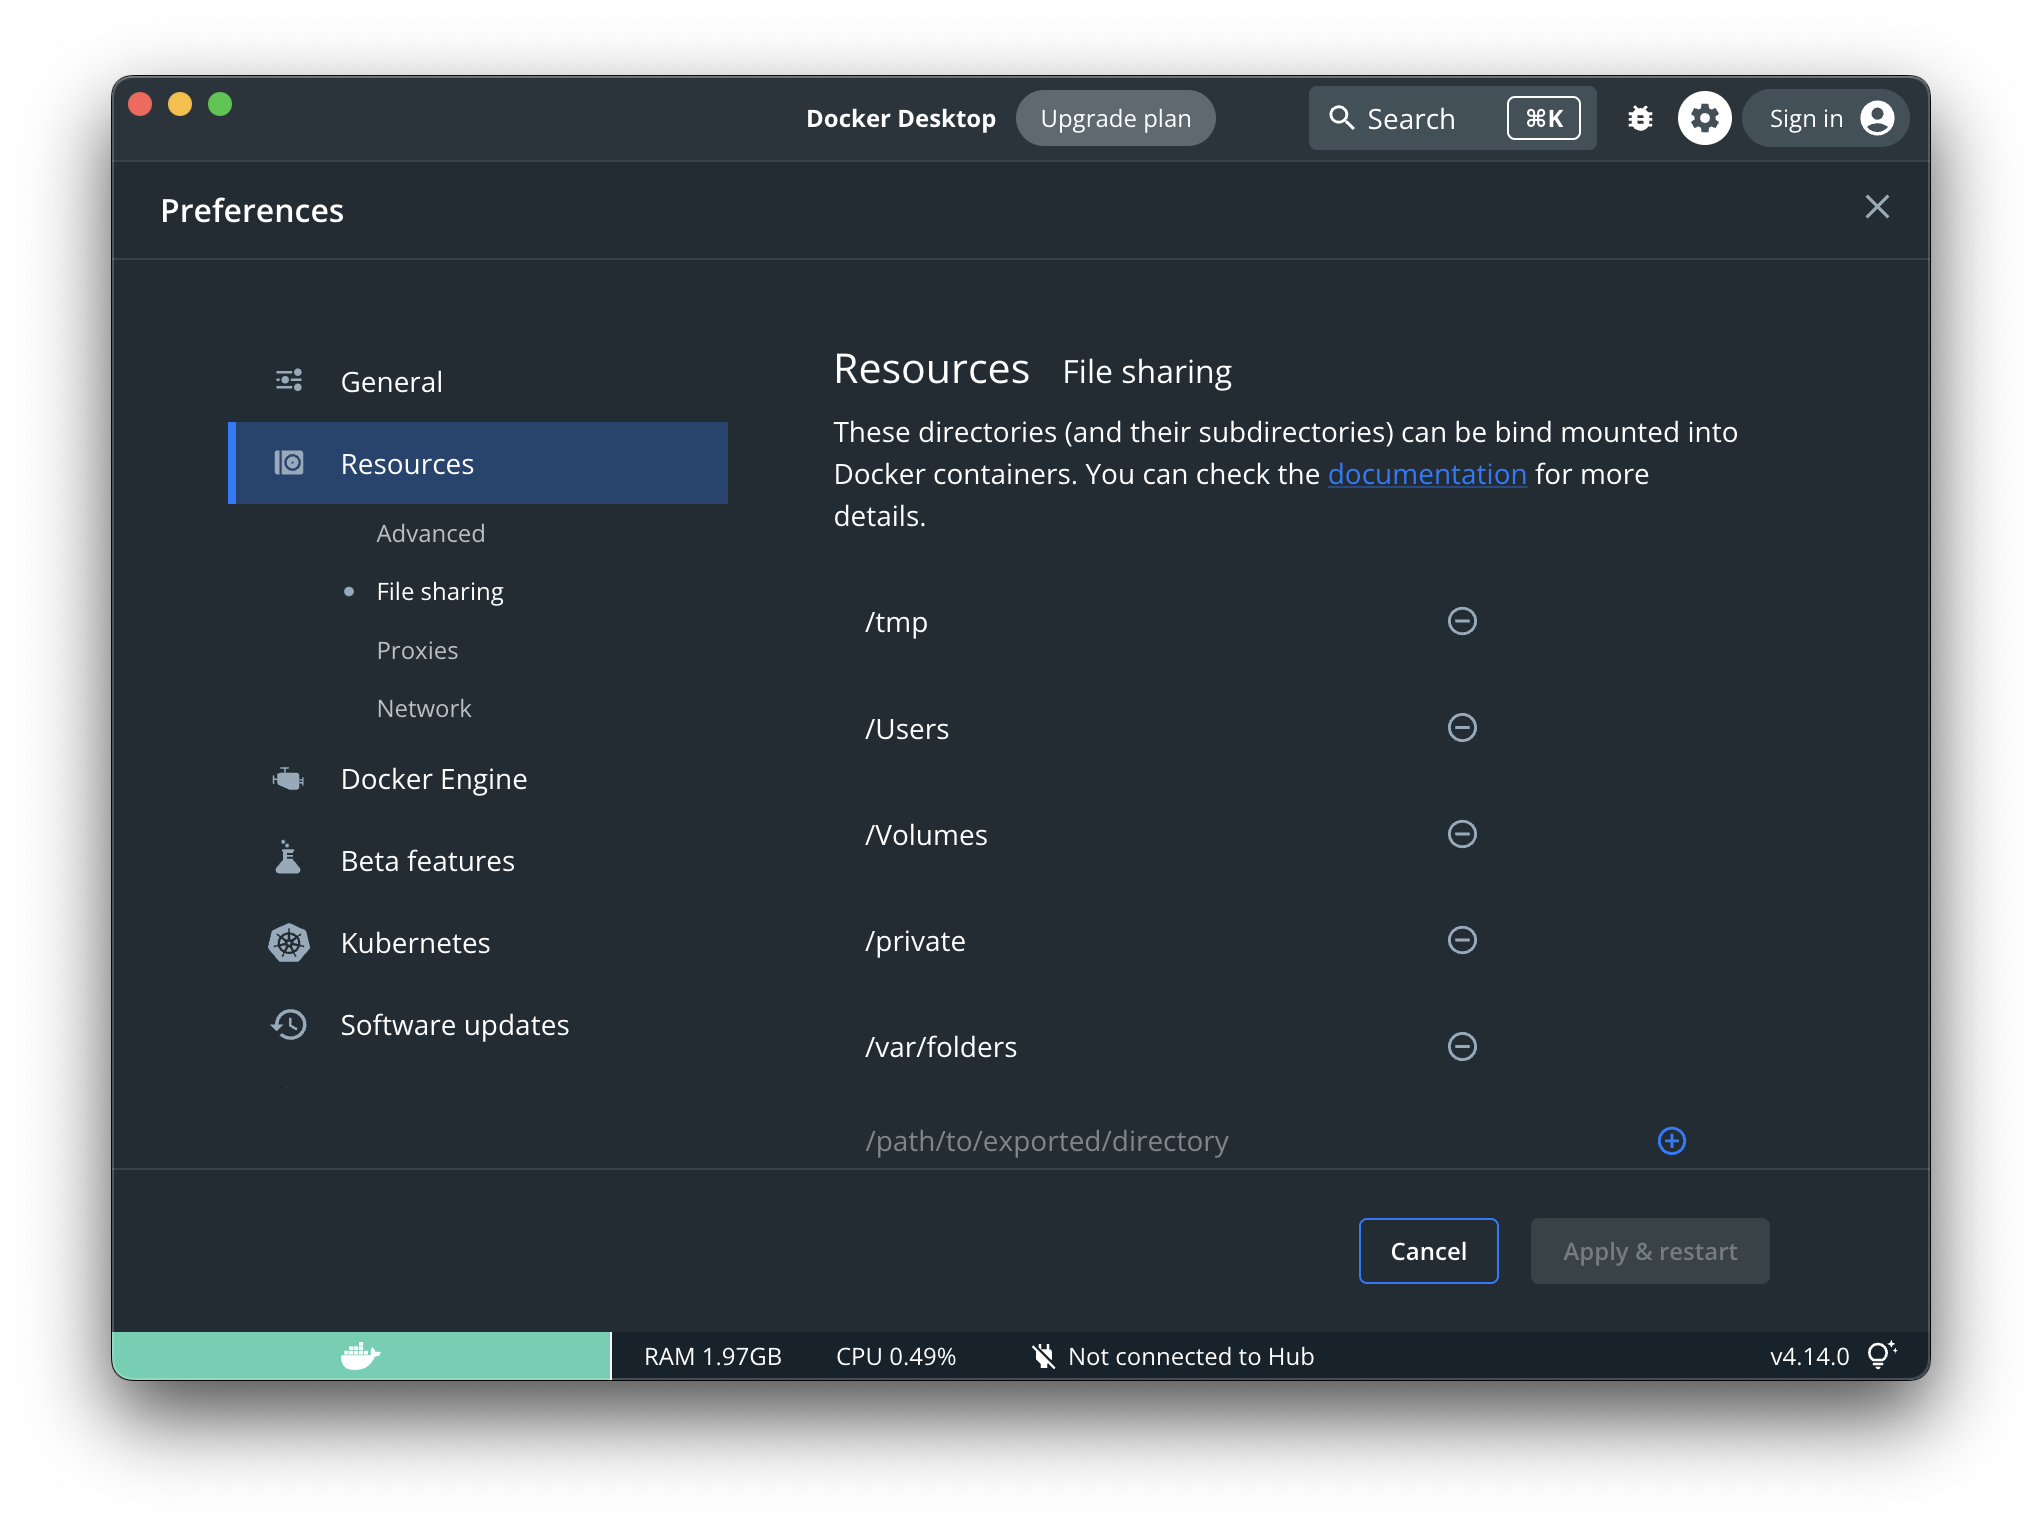
macOS Docker Desktop resources requirement
Tip
OrbStack for Mac is supported by Exegol wrapper from v4.2.0.
Your exegol installation cannot be stored under /opt directory when using OrbStack (due to OrbStack limitations).
This support is still in beta, feel free to open issues on GitHub if you encounter any bugs.
To support graphical applications (display sharing functionality, e.g. Bloodhound, Wireshark, Burp, etc.), additional dependencies and configuration are required:
Windows 10 (up to date), or Windows 11, is required
Docker Desktop installed on the Windows host
Docker Desktop must be configured to run on WSL2 engine (how to)
WSLg must be installed to support graphical application
at least one WSL distribution must be installed as well (e.g. Debian), with Docker integration enabled (see screenshot below)
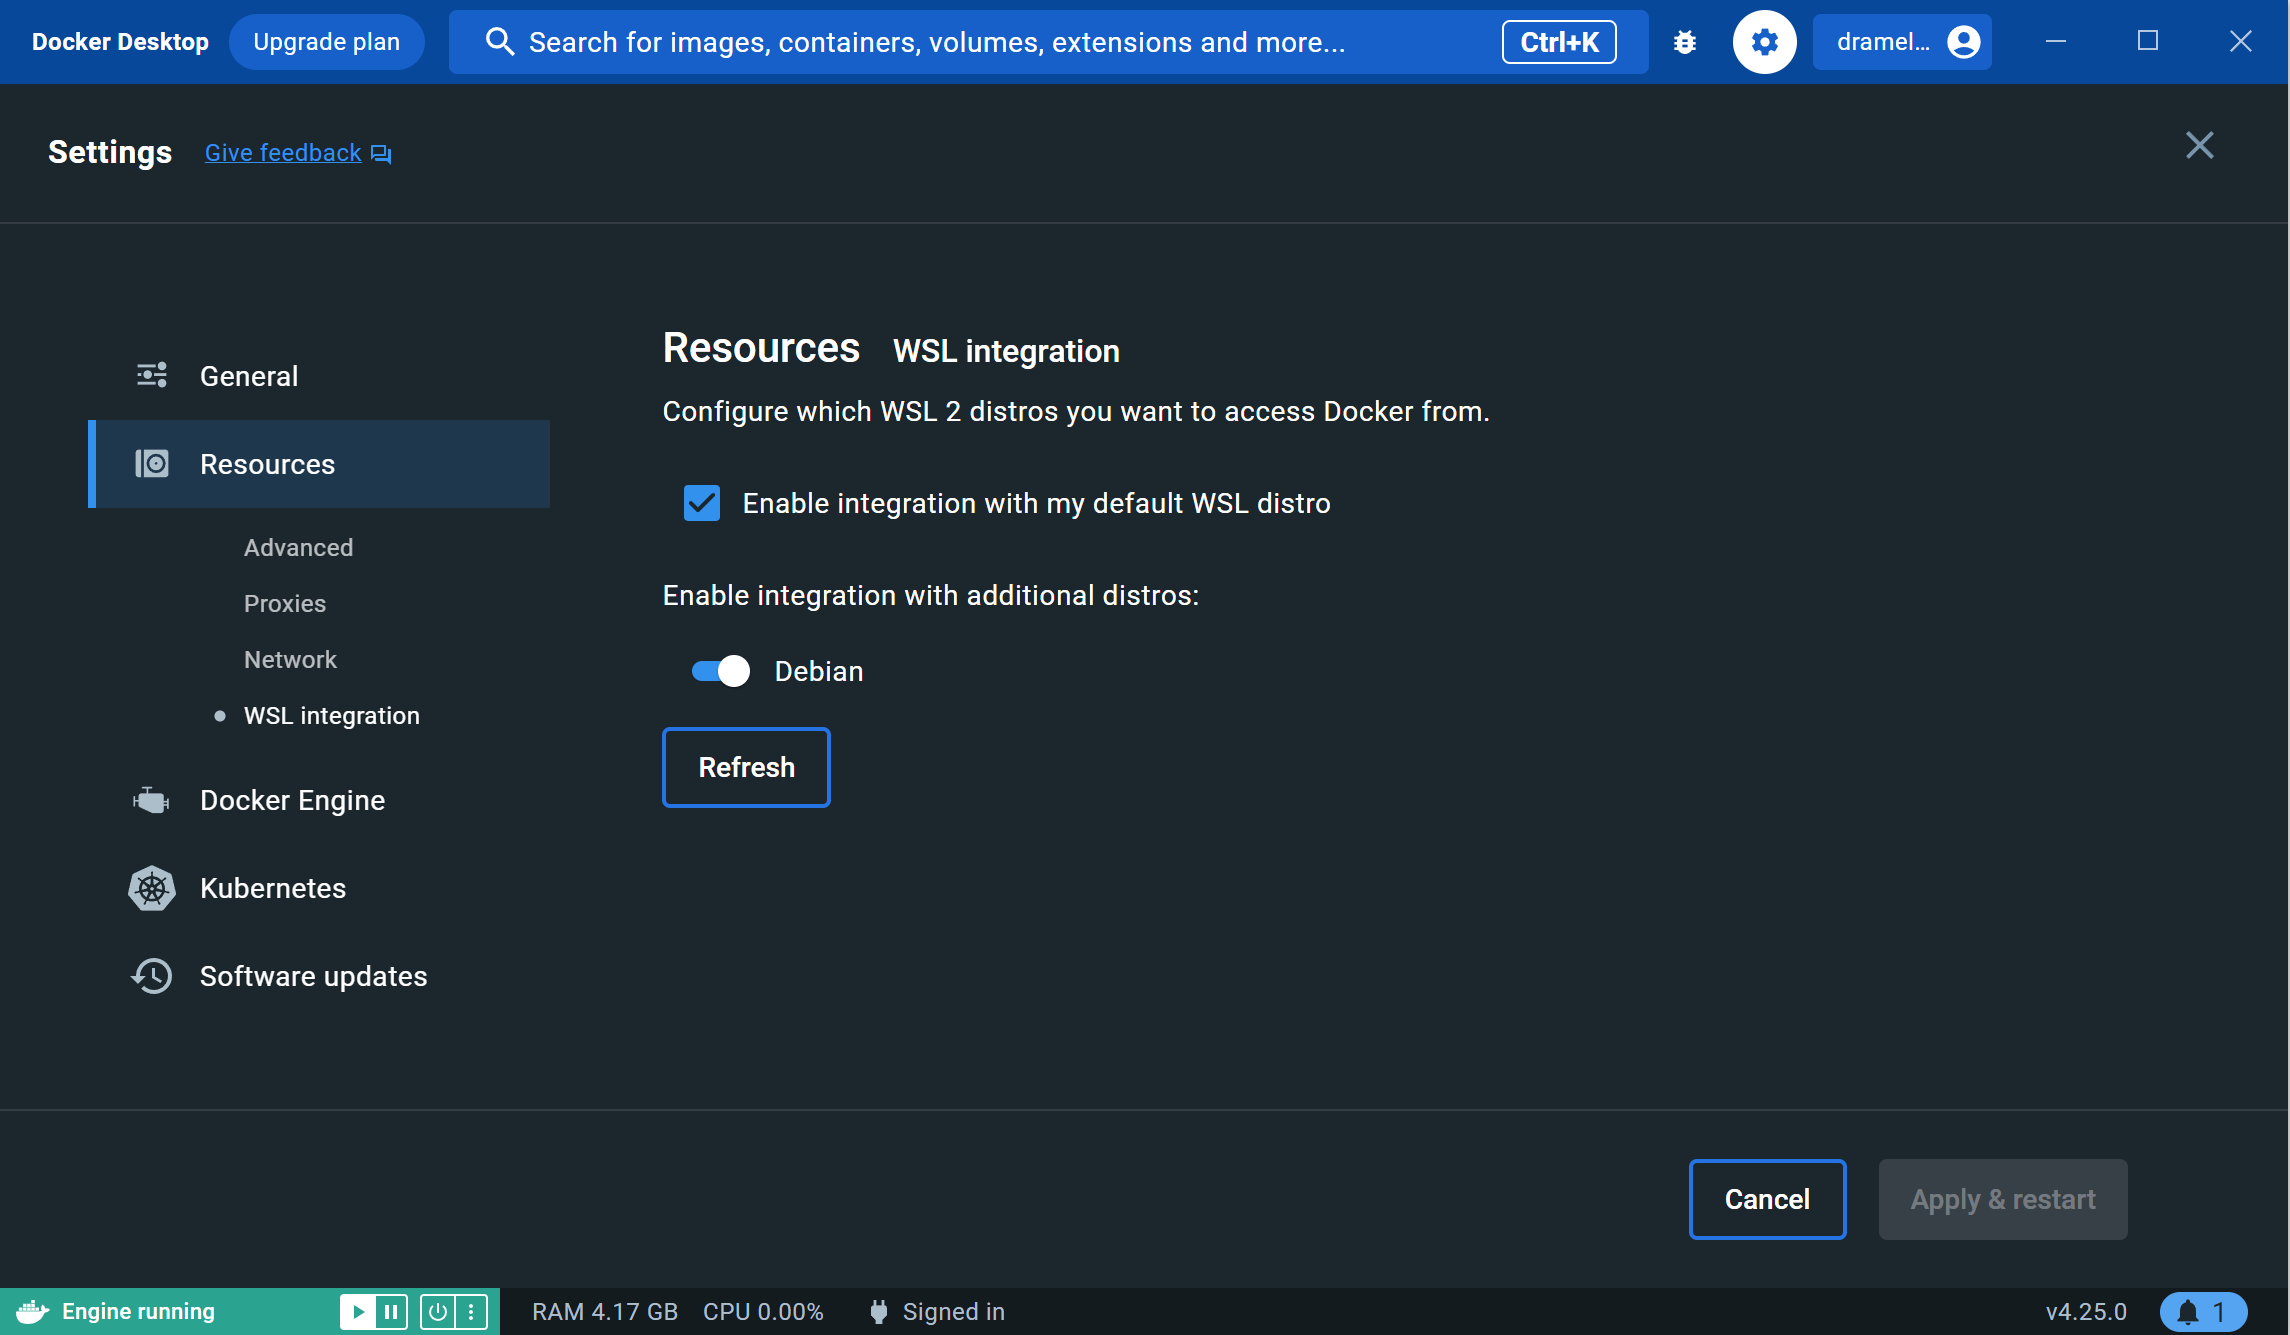
Windows Docker Desktop WSL integration configuration
In a Windows environment, the Exegol wrapper can be installed either in a WSL shell or directly in your Windows environment with Powershell.
Warning
Please note that it is not advisable to use Exegol from both environments at the same time, as this could lead to conflicts and Exegol does not officially support this configuration.
Installation
The installation of Exegol on Linux, macOS and Windows are very similar. It can either be installed from pip (easiest, most user-friendly, but with a few missing features) or from sources (easy as well, fully featured).
1. Installation of exegol
Exegol’s wrapper can be installed from pip. While this is the easiest and most user-friendly technique, for more advanced users it is advised to install from sources, as it allows to switch from release to dev branches easily and the auto-update feature is supported.
python3 -m pip install exegol
Warning
You may want to disable Windows Defender during the installation, as Exegol will download pre-built remote shells (or temporarily exclude C:\Users\<username>\AppData\Local\Temp).
You should also add the folder C:\Users\<user>\.exegol\exegol-resources to the exclution list.
Exegol’s wrapper can also be installed from sources (with Git). The wrapper then knows how to self-update, and switching from release and development branches is possible and very easy.
git clone "https://github.com/ThePorgs/Exegol"
Tip
If you want a light clone of Exegol (and never use the dev branch), you can use the following command:
git clone --shallow-since="2023/05/08" "https://github.com/ThePorgs/Exegol"
If you have access to docker directly as a user, you can install the requirements only for your current user otherwise the requirements must be installed as root to run Exegol with sudo.
sudo python3 -m pip install --requirement "Exegol/requirements.txt"
python3 -m pip install --user --requirement "Exegol/requirements.txt"
Exegol’s wrapper can also be installed with pipx either from sources or PyPI, which allows to install Exegol in a virtual environment of its own.
# install pipx if not already installed
python3 -m pip install pipx

# from sources
pipx install git+https://github.com/ThePorgs/Exegol

# packaged from PyPI
pipx install exegol
2. Adding Exegol to the PATH
If your pip installation is correct and functional, you have nothing more to do and you can already use the command exegol.
If not, remember that pip installs binaries in a dedicated local folder, which then must be in the PATH environment variable.
Try to fix your pip installation: Linux | MacOS | Windows
Once this is taken care of, the exegol wrapper can then be added to the PATH with a symlink for direct access. This allows to call exegol from wherever, instead of to use the absolute path. Exegol can then be used with exegol <action> instead of python3 /path/to/Exegol/exegol.py <action>.
sudo ln -s "$(pwd)/Exegol/exegol.py" "/usr/local/bin/exegol"
Once this is taken care of, the exegol wrapper can then can be added as a PowerShell command alias. Exegol can then be used with exegol <action> instead of python3 /path/to/Exegol/exegol.py <action>.
To create the alias file correctly, open a PowerShell and place yourself in the folder where exegol is located (applicable only for from source installations) and run the following commands:
Create $PROFILE file if it doesn’t exist:
if (!(Test-Path -Path $PROFILE)) {
    New-Item -ItemType File -Path $PROFILE -Force
}
Create alias for Exegol in $PROFILE:
echo "Set-Alias -Name exegol -Value '$(pwd)\exegol.py'" >> $PROFILE
Warning
To automatically load aliases from the .ps1 file, PowerShell’s Get-ExecutionPolicy must be set to RemoteSigned.
If the configuration is not correct it can be configured as administrator with the following command:
Set-ExecutionPolicy -ExecutionPolicy RemoteSigned
Tip
If you have installed Python3 manually and Windows opens the Microsoft store on the python page as soon as you type python3.exe, try this:
It is possible to disable this behavior in the Windows settings: Apps > Apps & features > App execution aliases and disable aliases for python.exe and python3.exe.
3. (Optional) Using Exegol auto-completion
Exegol (wrapper) supports auto-completion in many shell environments but there is a configuration to add (on the host) for this feature to work.
Tip
If you have a source installation, make sure you have installed (or updated) the requirements.txt packages before using the completer.
Important
The following configurations must be made in your host environment.
You can enable Exegol auto-completion for your current user with your .bashrc or you can enable the auto-completion system-wide with bash-completion.
To setup the auto-completion system-wide you first need to install bash-completion on your system (if not already installed).
sudo apt update && sudo apt install bash-completion
At this point you should have a /etc/bash_completion.d/ folder. It’s in there that you can add any auto-completion module that you want.
To generate and install the exegol completion configuration you can execute the following command with register-python-argcomplete:
register-python-argcomplete --no-defaults exegol | sudo tee /etc/bash_completion.d/exegol > /dev/null
Add the following command in your ~/.bashrc config:
eval "$(register-python-argcomplete --no-defaults exegol)"
Tip
If you have multiple tools using argcomplete you can also use the global completion method (need bash >= 4.2).
To activate completions for zsh you need to have bashcompinit enabled in zsh:
autoload -U bashcompinit
bashcompinit
Afterwards you can enable completion by adding the following command in your ~/.zshrc config:
eval "$(register-python-argcomplete --no-defaults exegol)"
To activate completions for fish use:
register-python-argcomplete --no-defaults --shell fish exegol | source
or create new completion file, e.g:
register-python-argcomplete --no-defaults --shell fish exegol > ~/.config/fish/completions/exegol.fish
To activate completions for tcsh use:
eval `register-python-argcomplete --no-defaults --shell tcsh exegol`
To activate completions for PowerShell, first generate completion file :
register-python-argcomplete --no-defaults --shell powershell exegol > $HOME\Documents\WindowsPowerShell\exegol_completion.psm1
Warning
If the command register-python-argcomplete is not found, that means that python pip script are not in your PATH.
You can ty to fix your pip installation: Linux | MacOS | Windows
Or find the direct Python script path, it might be something like: $HOME\AppData\Roaming\Python\Python311\Scripts\register-python-argcomplete (Python311 PATH depends on the version of Python you have installed, it must be updated to match your local setup).
Then import this completion file in $PROFILE:
echo "Import-Module '$HOME\Documents\WindowsPowerShell\exegol_completion.psm1'" >> $PROFILE
Tip
You can have Zsh style completion in PowerShell using this:
echo "Set-PSReadlineKeyHandler -Key Tab -Function MenuComplete" >> $PROFILE
4. Installation of the first Exegol image
Once the exegol wrapper is installed, you can download your first docker image with the following command:
exegol install